Friday, November 30, 2012

Friday's Film: Wrapped Band

This is a very simple style that you can do any morning and not have a huge time commitment.  You will need a stretchy headband and a Topsy Tail if you have one but it's not required.  
Pretty simple huh!
 Here's what the back looks like.
 Here's a shot of the side that wasn't shown in the video.
You can choose any sort of fancy stretch band to use.
I love hairstyles that are fast and easy!
*AWESOME PRODUCT ALERT*
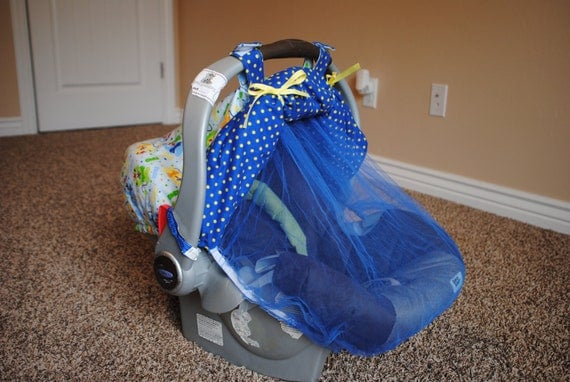
Car Seat Cover with Bug Net
So I don't promote really anything on  this blog but you have to check out these car seat canopy's with the bug covers.  They are FANTASTIC and I have loved mine!  My cute sister-in-law makes them and you can see her shop on Esty here so go check it out!


Tuesday, November 27, 2012

Kids Holidaywear at Neiman Marcus for Target


In just a few days, Neiman Marcus and Target will present Holiday24, an exclusive collection of 50 gorgeous gifts from 25 top designers. Starting December 1 for a limited time. The dresses below are by Designers Marchesa (Dark Pink Floral and off-white beaded dresses), and Jason Wu (solid and print dresses). Get a sneak peak at the collection on Target's website.


I love these holiday hairstyles to pair with the gorgeous dresses above. These hairstyles work well for holiday parties, Christmas and Hanukkah. Twisting back the sides and securing them with a bobby-pin in the back makes an elegant look with some loose ringlets on long or short little girls' hair. Perfect for all of your holiday celebrations! Older girls (around 6 years old) can do this style themselves.

image via motherbabyearth.com

Wednesday, November 21, 2012

Giving Thanks

Our family has so much to be thankful for this holiday season and I'm also thankful for such wonderful readers that follow our blog and enjoy our hairstyles.  Here are some fun hairstyles that we have used in the past to celebrate Thanksgiving.  (Just click on the names of the hairstyles and you will be taken to the original post.)

Here is the Turkey Foot

This is Turkey Time

And finally, here is our Thanksgiving Fun
Hopefully these will give you some fun ideas for the big day tomorrow!
Happy Thanksgiving everyone!

Monday, November 19, 2012

Girly Pink Gingerbread Houses

I first saw the idea of pink gingerbread houses in the American Girl doll Holiday 2012 catalog. I love non-traditional colors for Christmas to change things up a little, especially when you are decorating your daughter's room for the holidays, or like my little girl, who has a mini silver Christmas tree that we decorate in pastel pink, blue and purple, with silver and white accents. 

American Girl Doll's pink and purple glitter gingerbread house from their most recent catalog: 
More pink and girly-colored gingerbread houses for you to try:

Pastel Pinwheel house...(see how-to by TomKatStudio here:)

This pink holiday gingerbread house is by sweetopia using royal icing (see how-to and more girly houses here:)
images via: kawaiifoods; kittyandmedesigns.blogspot; tomkatstudio; snowfern-clover.blogspot; with-love-and-confection.blogspot

Crewcuts Girls Holiday Style

A great source of inspiration for holiday fashion can be found in J Crew's kids line, crewcuts, which has everything you need for little girls Christmas gifts, Christmas dresses, and festive winter clothing. The holiday 2012 crewcuts looks include sequins, glitter, flowers and tons of darling embellishments that I have found to last through many washings. I also love their ideas for holiday and winter photo shoots for little ones.

Wednesday, November 14, 2012

Girls Holiday Fingernails and Nail Art

Festive winter nail art and nail polish designs for little girls fingernails will keep your daughter's hands looking stylish all season! Most of these are DIY and some designs can be done by little girls themselves!

Candy Cane Striped nails with rhinestones
 
Christmas Tree Nail Art (using a stamper- see link at the end of the post)
Festive Green and red bauble nails
 Red and white stripes and a candy candy sticker decal
 Snowflakes on little girl's nails
 Santa, Candy Cane and snowflake nails (my little one loves every nail to be different like this!)
 Sparkly blue winter nails with white snowflakes for little girls
 More snowflake fingernails!


How-to for Christmas Tree nails using a stamp: susies1955.blogspot; Santa Clause French Manicure; Sparkly blue nails with snowflakes; Black and white Snowflake nails (this gal also has several other Christmas-y nail art ideas); light-blue snowflake nail design; Candy Cane Fingernails;

Tuesday, November 13, 2012

Holiday Hair Accessories

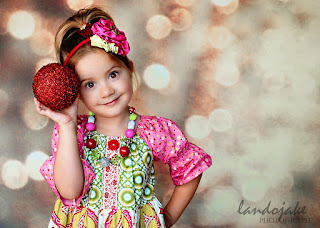
A festive headband or Christmas hairbow makes any girls hairstyle a bit more fancy. Here are some of my favorite hair accessories for the holidays. See where to buy at the end of this post!
 

images via hairstyletrends.biz; myblessedhome; haironmars; Etsy Snowflake Clip; Prissyinpink; Festive Hairbows from girlshue.com; Christmas headband from Etsy; Red Flower Christmas Headband for babies or girls - EtsyChristmas Chiffon Candy Cane Headband;

Holiday Girls Hairstyles


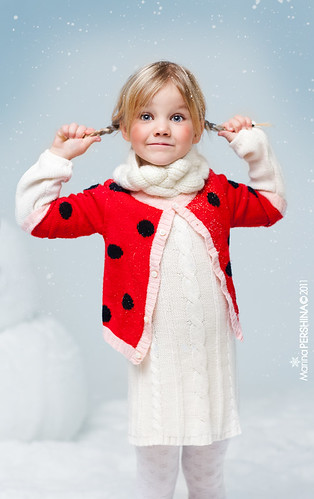
As the holiday season approaches, lots of us moms are in need of festive photo shoot ideas and hairstyle inspiration for our little girls. These Christmas, winter and festive photography ideas are from the very talented Marina Pershina. I love the idea of a holiday PJ photo shoot for little girls at this time of year.

Monday, November 12, 2012

Netted Overlay

Here's a pretty hairstyle and I love it because the netting is so fun and we haven't done netting for a long time.  Have lots of little elastics handy.  It's fun to pick a color that coordinates with the outfit if possible. 
 Start by creating a part from ear to ear that is only about an inch and a half from the bang line.  Now that you have that section of hair you can divide it into 8 equal sections and secure each with an elastic.  Comb all of the remaining hair straight down. Take each of the little ponytails from your sections and divide them in half - except for your section closest to each ear.  
Starting on the right, combine the whole section closest with the ear and the right half of the adjacent section together with a new elastic.  (About an inch farther back on the head.)  Now combine the other half of that adjacent section with the right half from the following section.
 Continue doing this around the head until you come to the far left where you will make sure to include the entire far left section with your final elastic.  Start on the right again and repeat the steps - making sure to add in the whole section closest to the ear.  You will have fewer and fewer sections as you move farther back on the head and your side should slowly start to come together towards the back.  

Once you are down to 4 elastics/sections go ahead and create a flat 4-Strand Braid.  Your netting should lie on top of the remaining hair that was combed straight giving it that "overlay" look.