Friday, June 29, 2012

Friday's Film: Tied Updo

Thanks for being patient while we were on vacation for a couple weeks.  We had a fabulous time in Hawaii and I wanted to share this picture of a French Braid that we found in Oahu:
 They have taken individual palm fronds and wrapped them around the stems of the trees and French Braided them. 
 They did a pretty good job don't you think?!

The hairstyle we've decided to share today is called the Tied Updo and it's simple yet beautiful.  The original inspiration for this hairstyle can be found on my Pinterest board here.

My princess has such dark hair when it is wet but hopefully you are still able to follow the instructions.
Here is a picture of the finished product.  Cute huh!
 
I wish that our puff was a bit bigger which would be an advantage to working with dry hair. 
 
You can use as many bobby pins as you need when securing your bow. 
Good luck and remember that practice makes perfect!

Friday, June 8, 2012

Friday's Film: Double Stack

*Just a note that we will be taking a vacation for a couple of weeks so we will not have any new posts during that time.  We will be posting after that though so keep checking in!*  :)

We've called this style the Double Stack and I actually saw something similar to this on one of the awards shows on television but I have searched everywhere and I can't find the original source.  It's a very easy style but you will need to have two bun molds or rolled socks to accomplish this style.
I told you it was easy!
Here's a picture of the finished product.
You can see that it is taller than a regular bun but has a really elegant look to it. 
We used wet hair when creating this style and didn't have any problem with it holding tightly. 
Remember to really take the time to make sure the hair is spread out evenly over those bun molds so that your finished bun looks really clean. 
Happy Summer and we will see you after vacation!

Wednesday, June 6, 2012

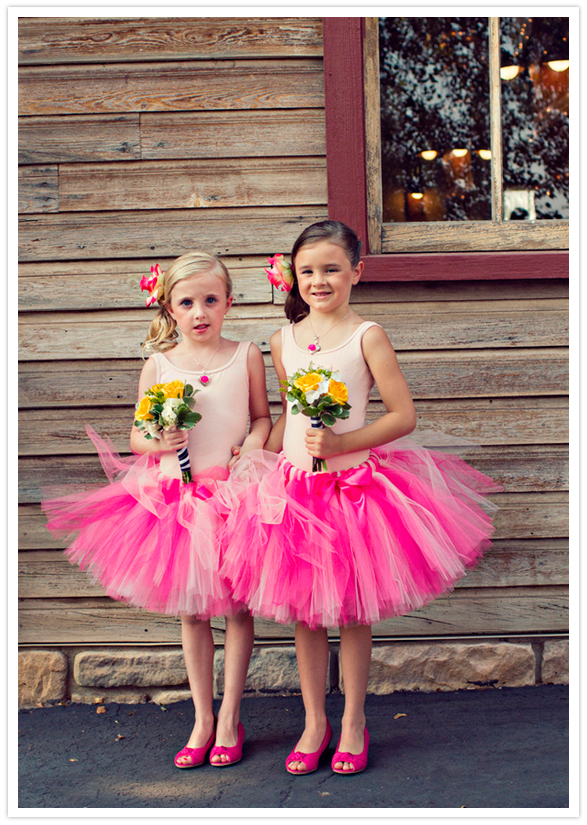
Side Pony Flower Girls

Ballerina flower girls sporting tulle tutus in the wedding colors have been hugely popular this summer. These tween-age flower girls are beautiful with side ponytails and matching flowers (not to mention their pink kitten heels!). 
image via 100LayerCake

Kissy Lips & Bendy Braids

You will definitely need a Topsy Tail or tool like it for this hairstyle.  It's got two parts to it - the "Kissy Lips" and the "Bendy Braids" but they both derive from the same components, Inverted Pull-Throughs and regular Pull-Throughs. 
Here is what the Kissy Lips look like.  First you will gather a section of hair at the top of the head into an elastic.  Then create an Inverted Pull-Through by poking your Topsy Tail up from under the elastic and pulling the hair through.  Next you will gather another section of hair right before the first and secure it into an elastic - making sure to add in that hair from your Inverted Pull Through.  Have your new elastic lying fairly close to your previous one.  Now create a regular Pull-Through with that new section of hair by poking your Topsy Tail down through the hair behind the elastic.  These two Pull-Throughs create your Kissy Lips.
I've sectioned out the hair and done two sets of Kissy Lips on each side of the head. 
The lower set of Kissy Lips lies in the middle of the head on either side.
The hairstyle is finished off with Bendy Braids that are created simply by securing an elastic around the ponytail - about 1.5 inches below the previous elastic.  Now grab your Topsy Tail and create and Inverted Pull-Through with that section of your ponytail.  Add in another elastic (again 1.5 inches down) and create a regular Pull-Through.  Continue this pattern down through the ponytail and then follow the steps with the opposite ponytail as well.  The two different kind of Pull-Throughs will create a bent look in the ponytail.  The picture doesn't really do these justice but they are pretty cool. 

Monday, June 4, 2012

Side Braid Bun

This is not a new hairstyle by any means but it is the first time we have ever done it.  You only need to know how to do a basic French Braid (We have a video for that here ) and all you need is one elastic, some bobby pins, and a flower clip.  This hairstyle actually looked a bit better when it was done with dry hair but we did use extra hairspray when doing it dry so that we didn't end up with a ton of fly-aways.
We started by creating an off-centered part at the front of the head that was about 2 inches long.  We started on the smaller side of the part and grabbed a section of hair that was divided into 3 equal sections.
This is where you will begin your French Braid.  Just make sure that your Braid goes across the back of the head rather than down the head.   
Work your way around to the other side of the head and gather in the remaining hair.  Once it's all been added in, finish plaiting the braid with just a Regular 3-Strand and then secure it at the bottom with an elastic. 
Wrap that 3-Strand Braid around itself and secure it against the head with bobby pins.  Make sure that you have all of your ends tucked under the bun so they won't show.  Add a flower clip to the front of the bun and it's finished. 

Friday, June 1, 2012

Hairdos for toddler girls with short hair

Friday's Film: Basket Weaving

This was another hairstyle that we got SEVERAL requests for a video on.

 It's our Basket Weaving hairstyle from last week and it's very easy as you will see.
The original post for this style can be found here and it's got the written instructions plus some more pictures.

There are several ways you could end this hairstyle.  Here we have two piggies and in the video we have a 4-Strand Braid.  You can use whatever you like.